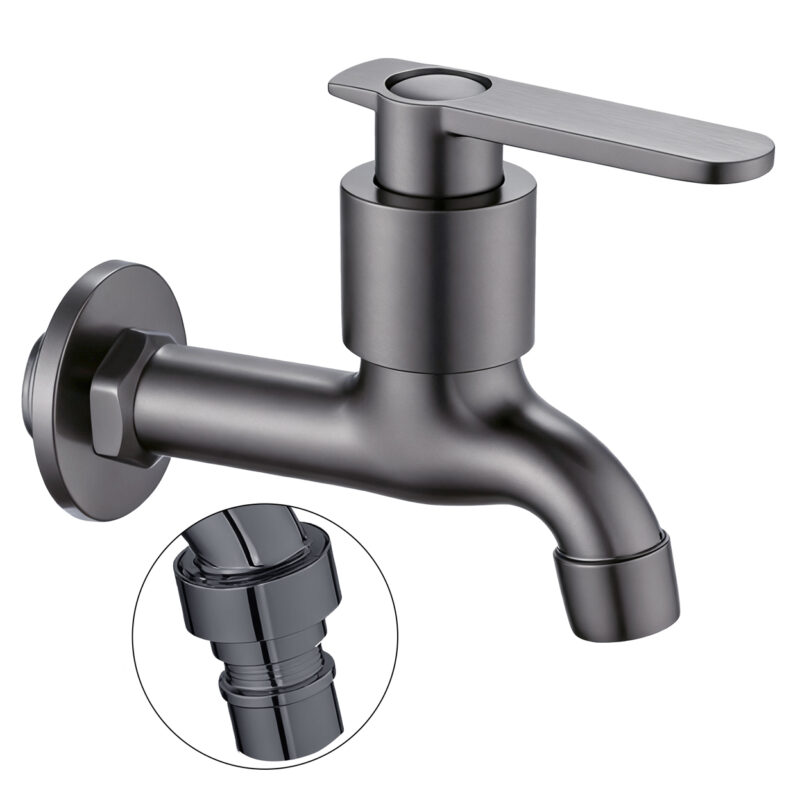
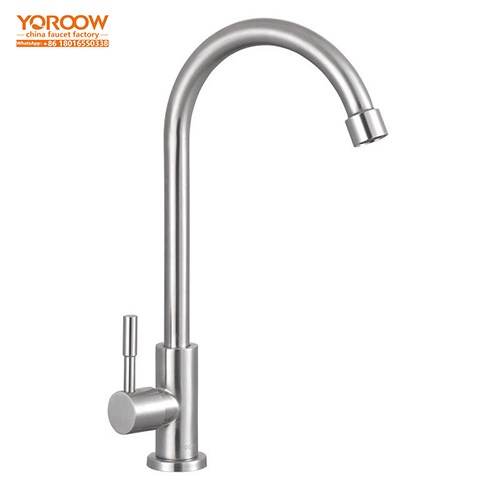
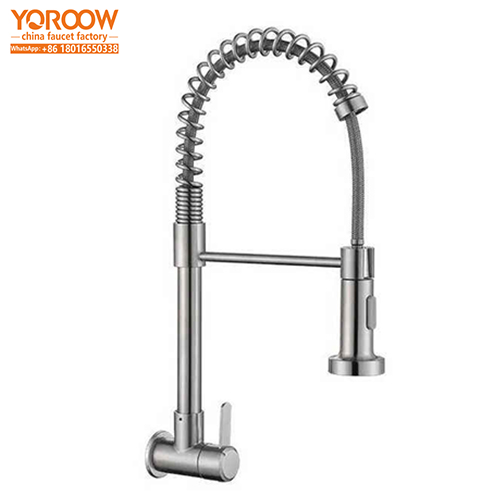
In the process of upgrading modern kitchens, stainless steel kitchen tap single – cold basin faucets, featuring practical rotating functions and stylish matte black exteriors, have gradually become the favored choice for many households. Relying on mature production processes and strict quality control, Chinese faucet factories manufacture such faucets using high – quality stainless steel. With a special matte black coating treatment, these faucets are not only durable and resistant to dirt and fingerprints but also can seamlessly blend with various kitchen decoration styles. Standardized installation is crucial to ensure the stable performance of these faucets. The following provides a detailed and practical guide covering the entire installation process, from preliminary preparations and operation steps to post – installation maintenance.
(I) Precautions Before Product Installation
Before the actual installation of stainless steel kitchen tap single – cold basin faucets, a comprehensive understanding of product characteristics and installation conditions is the top priority. Faucets of this type produced by Chinese faucet factories have a main body made of 304 stainless steel. Thanks to the reasonable proportion of elements such as chromium and nickel, this material has excellent corrosion resistance. The matte black coating on the surface undergoes a 12 – process vacuum ion plating treatment, forming a dense protective layer that effectively resists daily scratches and stain adhesion.
Before installation, carefully confirm that the size of the installation hole on the sink or countertop is compatible with the faucet. The common standard for single – hole installation hole diameter is 35 – 40mm. If the hole diameter is too large or too small, it may affect the installation stability and sealing performance. At the same time, checking the water pressure of the kitchen water supply system cannot be ignored. A water pressure range of 0.1 – 1.0MPa is suitable for the normal operation of the faucet. Excessively high water pressure may accelerate the aging of seals and increase the risk of water leakage, while too low water pressure will affect the water flow effect. In addition, be sure to turn off the main kitchen water valve in advance and open the faucet to empty the remaining water in the pipes, eliminating the possibility of water leakage during the installation process from the source.
(II) Required Installation Tools
As the saying goes, “A workman must first sharpen his tools if he is to do his work well.” Preparing a complete set of suitable installation tools is the foundation for a smooth installation process. To install stainless steel kitchen tap single – cold basin faucets, you need to prepare the following tools:
- Adjustable Wrench: Used to tighten fixing nuts and water pipe interface nuts. Its adjustable opening design can fit nuts of different sizes, ensuring a secure connection.
- Screwdriver: Prepare a Phillips or flat – head screwdriver according to the type of screws in the faucet accessories, which is used for disassembling packaging fasteners and fixing parts during the installation process.
- PTFE Sealing Tape (Teflon Tape): Wrapping PTFE sealing tape around the water pipe interface can enhance the sealing performance of the connection and effectively prevent water seepage.
- Spirit Level: Helps ensure that the faucet is installed vertically, avoiding the deviation of the water flow direction during use or affecting the appearance due to tilting.
- Rubber Gloves: Protects your hands during operation, preventing scratches from the edges of metal parts. At the same time, it increases the friction of the hands, making it easier to apply force during operation.
- Towel or Sponge: Used to clean up water stains that drip during the installation process at any time, keeping the operation area dry and clean, and avoiding affecting the installation effect due to water stain residue.
(III) Pre – installation Preparation Steps
1. Inventory and Verification of Accessories
After obtaining the faucet produced by a Chinese faucet factory, first carefully check whether all accessories are complete. Usually, the product accessories include the faucet body, rotating base, fixing nuts, gaskets, installation instructions, warranty card, etc. Ensure that all accessories are intact and the quantity is accurate. If any shortage or damage is found, contact the merchant in a timely manner to avoid affecting the installation progress.
2. Cleaning and Treatment of the Installation Surface
Use a damp cloth to carefully clean the debris, dust, and oil stains around the installation hole on the sink or countertop to ensure that the installation surface is clean and flat. If there are burrs on the edge of the installation hole, gently sand it smooth with sandpaper to prevent scratching the sealing gasket during installation and affecting the sealing effect.
3. Preparation of PTFE Sealing Tape Wrapping
Wrap the PTFE sealing tape tightly around the water pipe interface in a clockwise direction, with the number of wraps controlled at 5 – 8. When wrapping, pay attention to applying uniform force to avoid looseness or excessive overlap, preparing the PTFE sealing tape to play a good sealing role in subsequent connections.
(IV) Standard Installation Process
 1. Installation of the Faucet Body
Carefully pass the body of the stainless steel kitchen tap single – cold basin faucet through the installation hole of the sink or countertop, and then put on the gasket and fixing nut from below. Use an adjustable wrench to tighten the fixing nut. When tightening, pay attention to applying moderate force: excessive force may cause deformation of the faucet body, while insufficient force will make the faucet installation unstable and cause shaking during use. It is recommended to tighten it gradually in multiple times and observe whether the faucet remains vertical at the same time.
2. Connection of the Water Supply Hose
Align the water supply hose with the water inlet of the faucet. Wrap PTFE sealing tape around the interface and then tighten the connection nut with a wrench. When connecting, make sure that the hose is inserted in place to avoid water leakage caused by too shallow insertion. After the connection is completed, gently tug the hose to check whether the connection is firm and there is no looseness.
3. Installation of the Rotating Base
For the rotating base, precisely align it with the faucet body, align the installation holes, and then tighten the fixing screws. During the installation process, ensure that the base is installed flat and the screws are tightened evenly to ensure that the faucet rotates smoothly without obvious gaps. After the installation is completed, manually rotate the faucet to test its rotation flexibility.
4. Inspection Before Water – Supply Testing
After completing the above installation steps, before opening the main kitchen water valve, carefully check all connection parts again. Check whether the nuts are tightened and whether the gaskets are installed in place to ensure that there are no omissions or improper installations.
5. Water – Supply Testing and Adjustment
Slowly open the main kitchen water valve and observe whether there is any water leakage at each connection of the faucet. If leakage is found, immediately close the water source, re – tighten the nuts or appropriately increase the number of PTFE sealing tape wraps until there is no leakage. At the same time, turn on the faucet to check whether the water flow is smooth and whether the aerator is working properly. The water flow should be even, gentle, and free of splashing.
(V) Usage Testing and Inspection Key Points
After the installation is completed and the water – supply test is normal, a comprehensive usage test is still required. Repeatedly turn the faucet on and off to feel whether the switch operation is smooth and there is no sense of 卡顿. Test the rotating function of the faucet to ensure that it can rotate 360° flexibly and there is no obvious resistance or abnormal noise during the rotation. Check all connection parts again, including the connection between the faucet and the sink, and the water pipe interface, to confirm that there is no water seepage. If abnormal water flow is found during the test, such as too small water flow or scattered water flow, check whether the water supply hose is bent or the filter screen is blocked, and make timely adjustments or cleanings.
(VI) Common Installation Problems and Solutions
1. Unstable Faucet Fixing
Manifested as the faucet shaking or shifting during use. The possible reasons are that the fixing nut is not tightened or the gasket is placed incorrectly or damaged. The solution is to turn off the water source, re – tighten the fixing nut, check whether the gasket is installed correctly, and replace the gasket with a new one if it is damaged.
2. Water Leakage at the Connection
This is a common problem during the installation process. The main reasons are usually insufficient or uneven wrapping of the PTFE sealing tape, or the nut is not tightened. When dealing with this problem, first turn off the main water valve, disassemble the connection part, re – wrap the PTFE sealing tape, ensure that the wrapping is tight and even, and then tighten the nut with a wrench. Conduct another water – supply test until there is no leakage.
3. Excessive Rotation Resistance
If there is obvious resistance when rotating the faucet, it may be that the screws of the rotating base are too tight or the internal components of the base are installed incorrectly. Appropriately loosen the base screws to an appropriate tightness. If it is a component installation problem, it is necessary to disassemble the base again and install it correctly according to the installation instructions.
4. Too Small Water Flow
It may be that the water supply hose is bent or blocked inside, or the filter screen inside the faucet is blocked by impurities. Check whether the water supply hose is bent and adjust it to a normal state if necessary. Remove the faucet filter screen, rinse it with clean water or clean the impurities with a soft brush to ensure unobstructed water flow.
(VII) Safety Tips and Maintenance Suggestions
1. Safety tips
During the installation and usage process, safety is always the top priority. When operating, be sure to wear rubber gloves to avoid being scratched by the edges of the metal parts of the faucet. After installation is completed, non-professionals are not allowed to disassemble the internal parts of the faucet at will to avoid damaging the sealing structure and causing water leakage problems. In addition, during the installation process, avoid having tools or accessories fall into the sewer to prevent pipe blockage.
2. Maintenance suggestions
Daily cleaning: It is recommended to wipe the surface of the faucet with a soft damp cloth every week to remove water stains, oil stains and dust, and keep its appearance smooth and clean. Avoid using steel wool balls, hard cleaning brushes or cleaning agents containing corrosive components to prevent scratching the surface coating.
Regular inspection: Check the sealing of each connection of the faucet every six months to see if the nuts are loose and if the raw tape is aged. If the raw tape is found to be aged or its sealing effect has declined, replace it with a new one in time.
If the faucet is not used for a long time, the main water valve should be closed and the faucet opened to drain the water in the pipeline to prevent the remaining water in the pipeline from freezing and expanding, which could damage the faucet and the pipeline.
By following the above installation and maintenance suggestions, the stainless steel kitchen tap single-cooling sink faucet in your home can always maintain good performance, providing long-term and stable convenience and quality guarantee for kitchen life.