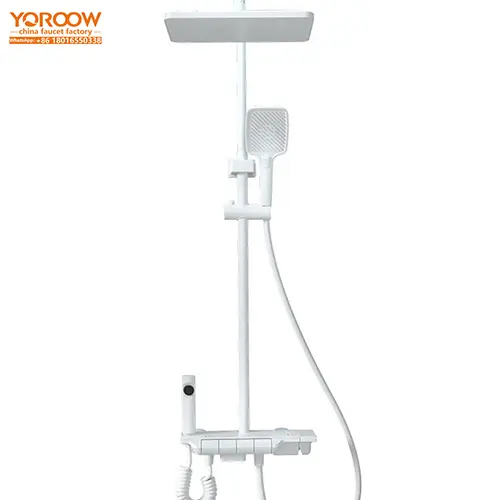
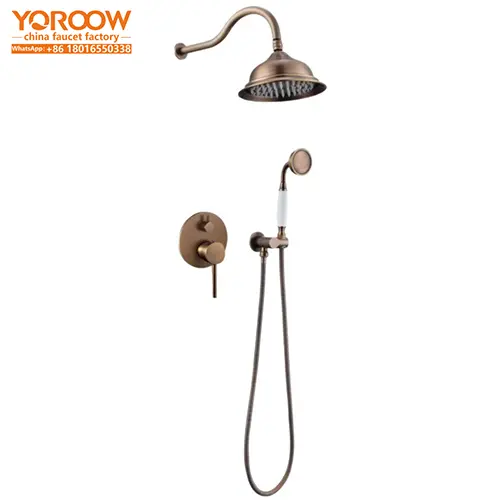
Le set de douche caché or has become an ideal choice for high – end bathroom renovations, thanks to its minimalist and luxurious design and excellent functionality. However, to enable this high – end equipment to perform at its best, correct installation is of utmost importance. The concealed gold shower sets produced by Usines de robinetterie chinoises with exquisite craftsmanship and professional technology require attention to many details during the installation process. The following will provide you with a detailed introduction to the entire process from pre – installation preparation to use and maintenance, helping you complete the installation smoothly and enjoy a high – quality shower experience.
I. Précautions à prendre avant l'installation du produit
Before installing the concealed shower set gold, first, confirm the structure of the bathroom wall. If the wall is made of hollow bricks or is a non – load – bearing wall, it is necessary to communicate with professionals in advance and enhance the wall’s load – bearing capacity by installing a load – bearing backplane or other means to ensure the stable installation of the shower. At the same time, understand the pressure of the home water supply system. Generally, this type of set has certain requirements for water pressure. An appropriate water pressure range can ensure uniform and smooth water output from the overhead shower and handheld shower. Too low or too high water pressure may affect the use effect, and it can be detected with a water pressure gauge. In addition, carefully check the product accessories. Sets produced by Chinese faucet factories usually come with a detailed list to ensure that components such as large – sized overhead showers, handheld showers, and thermostatic mixing valves are included, avoiding installation interruptions due to missing accessories.
II. Outils d'installation nécessaires
The smooth progress of the installation work depends on suitable tools. Mainly, you need to prepare a power drill, wrenches (including adjustable wrenches and pipe wrenches), screwdrivers, a spirit level, a tape measure, Teflon tape, sealant, etc. The power drill is used to drill holes in the wall to prepare for embedding pipes and fixing components; wrenches are used to tighten pipe fittings to ensure a tight connection without leakage; screwdrivers are used to install components such as the control panel; the spirit level ensures that the shower is installed horizontally to avoid uneven water flow; the tape measure is used to accurately measure the installation position; Teflon tape and sealant are used to seal the pipe fittings to prevent leakage.
III. Pre – installation Preparation Steps
Pre – installation preparation work is the foundation for ensuring a smooth installation. The first step is to accurately mark the installation positions of each component on the wall according to the product installation manual, such as the center position of the overhead shower and the height of the control panel. When marking, use a tape measure and a spirit level to ensure accurate positions and horizontal alignment. The second step is to close the main water supply valve of the house and open the faucet to empty the remaining water in the pipes to prevent water spraying during the installation process. The third step is to clean the installation area on the wall, removing dust, oil stains, and other impurities. If the wall is uneven, leveling treatment is required to create good conditions for subsequent installation.
IV. Processus d'installation standard
First, carry out pipe embedding. Drill holes in the wall according to the marked positions, and lay the cold and hot water pipes inside the wall according to the designed route. Pay attention to the slope of the pipes to meet the drainage requirements and avoid water accumulation. After the pipes are laid, install the concealed thermostatic mixing valve, fix it in the appropriate position, and connect the cold and hot water pipes strictly according to the markings, ensuring that the red interface is connected to the hot water and the blue interface is connected to the cold water. Wrap enough Teflon tape at the connection to prevent leakage.
Next, install the large – sized overhead shower. Install the fixing bracket of the overhead shower at the marked position on the wall, use a spirit level to calibrate the level of the bracket, and tighten the screws to fix it after ensuring that the installation is correct. Then connect the overhead shower to the bracket, paying attention to sealing the interface to prevent water seepage. After that, install the handheld shower and the multi – functional water outlet control system. Connect the hose of the handheld shower tightly to the mixing valve, and then install the control system at a height that is convenient for operation. After fixing it, check its operation flexibility.
V. Essais d'utilisation et inspection Points clés
After the installation is completed, do not use it immediately; instead, conduct a comprehensive test. Open the main water supply valve and observe whether there are any leaks at each pipe fitting interface, focusing on checking the interfaces of the mixing valve, the connection of the overhead shower, and other parts. If there is leakage, close the valve in time and re – seal it. Test the water output of the overhead shower and the handheld shower, and check whether the water flow is uniform and whether different water output modes can be switched normally. For sets with a thermostatic function, adjust the water temperature and observe whether the water temperature can be stabilized at the set temperature to ensure that there will be no sudden changes in hot and cold.
VI. Problèmes d'installation courants et solutions
Some problems may occur during the installation process. For example, if there is a leak at the pipe interface, it may be due to insufficient wrapping of Teflon tape or insufficient tightening force. You can re – wrap the Teflon tape and increase the tightening force appropriately. If the water output of the overhead shower is uneven, it may be due to an inclined installation angle. Use a spirit level to re – calibrate and adjust the installation angle. If the control panel does not operate sensitively, it may be due to loose wiring connections. Open the panel, check the wiring, and reconnect it firmly.
VII. Conseils de sécurité et suggestions d'entretien
In terms of safety, make sure the power is turned off during the installation process to avoid the risk of electric shock; when using tools such as a power drill, strictly follow the operating procedures to prevent injuries. For daily maintenance, regularly clean the surface of the gold shower. Avoid using rough tools such as steel wool to prevent scratching the PVD gold – plating layer. It is recommended to use a soft damp cloth with a neutral cleaner for wiping, and dry the water stains with a dry cloth after cleaning. Regularly check whether the pipe fittings are loose, and tighten them if necessary. The high – quality products produced by Chinese faucet factories can maintain their luxurious appearance and good performance for a long time as long as proper maintenance is carried out, continuously bringing you a comfortable shower experience.
