I. Precautions Before Product Installation
II. Required Installation Tools
2.Screwdriver: Prepare a flat – head screwdriver or a Phillips – head screwdriver according to the type of fixing screws of the tap, used for disassembling and installing some fixing components.
3.Tape Measure: Accurately measure the size of the sink installation holes, ensuring that the measurement error is controlled within ±1mm to ensure the accurate installation position of the tap.
4.PTFE Tape: As an important sealing material, it is wrapped around the water pipe joints to effectively enhance the tightness of the connections and prevent water leakage. It is generally recommended to wrap 5 – 8 turns, and the wrapping should be uniform and tight.
5.Pliers: During the installation process, if the water pipe joints are too tight or parts need to be adjusted, pliers can assist in the operation, providing additional gripping force.
III. Preparation Steps Before Installation
 1.Measurement and Verification: Use a tape measure to accurately measure the diameter, quantity, and spacing of the sink installation holes. Carefully compare the measurement data with the installation requirements in the tap product manual to ensure a perfect fit between the sink and the tap. If the sink installation holes are irregular or have size deviations, appropriate modification or replacement of the sink may be required to ensure the installation effect.
2.Clean the Installation Area: Thoroughly clean the sink installation holes and the surrounding area. Use a cleaning agent to remove oil stains, debris, and residual sealant, then wipe it clean with a damp cloth, and finally dry it with a dry cloth to ensure that the installation surface is flat, dry, and free of impurities. A clean installation surface helps the sealing gasket function better, improving the tightness and stability of the installation.
3.Confirm Accessories and Installation Sequence: Check again whether the tap accessories are complete and refer to the installation diagram in the product manual to familiarize yourself with the installation positions and sequences of each component. For complex installation structures, you can simulate the installation process in your mind in advance to avoid confusion during installation.
رابعاً. عملية التثبيت القياسية
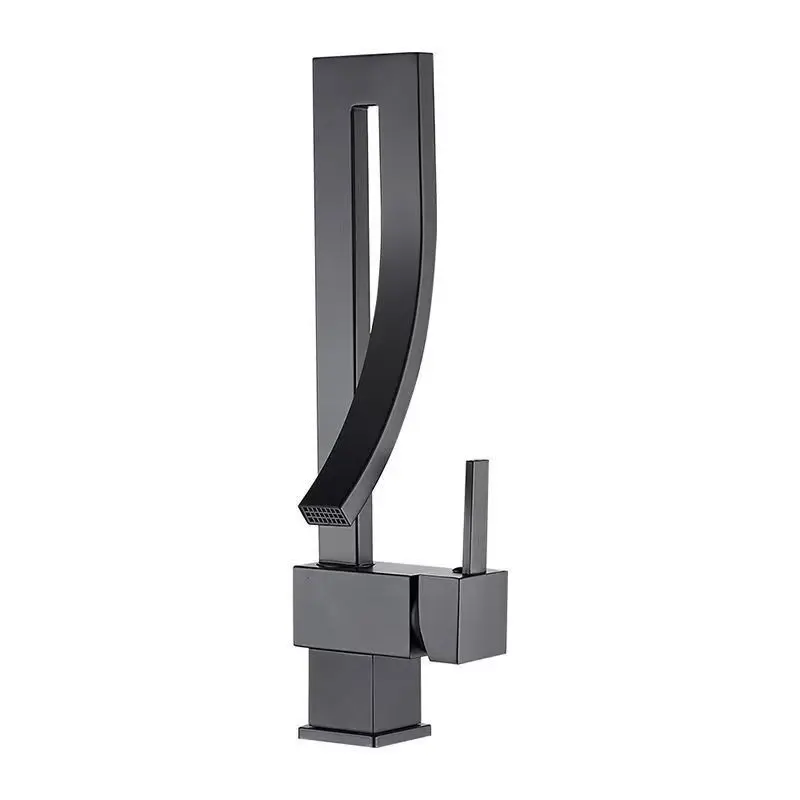
1.Install the Tap Body: Slowly pass the main body of the kitchen gun metal tap through the installation hole from above the sink. During this process, keep the tap vertical and upright to avoid tilting or offsetting. Under the sink, put on the sealing gasket and fixing nut in sequence. The sealing gasket should completely cover the edge of the installation hole to ensure the sealing effect; tighten the fixing nut, but pay attention to controlling the force to avoid damaging the sink or the tap due to excessive force. It is recommended to tighten the nut diagonally, gradually tightening it in multiple steps to make the tap evenly stressed and firmly installed on the sink. When the tap is firmly installed without shaking or loosening, the main body installation is completed.
2.Connect the Inlet Pipe: Connect one end of the inlet pipe tightly to the water inlet of the tap. Before connection, evenly wrap PTFE tape around the joint in the same direction as the thread – tightening direction to enhance the sealing effect. After wrapping, use a wrench to tighten the joint to ensure a firm connection without looseness. Connect the other end to the cold water pipe in the kitchen, also ensuring a good seal. When connecting, pay attention to the reasonable routing of the inlet pipe to avoid twisting or bending, which may affect the smooth water flow. After the connection is completed, gently pull the inlet pipe to check whether the connection is secure.
V. Usage Testing and Inspection Key Points
 1.Water Source Opening Test: Slowly open the main kitchen water valve, and then turn on the tap switch to observe whether the water flow is smooth. Under normal circumstances, the water flow should be stable and continuous without interruption or abnormal spraying. If the water flow is not smooth, it may be due to improper connection of the inlet pipe or internal blockage, and it is necessary to check and reconnect.
2.Check for Leakage: Focus on checking whether there is any water leakage at the connection between the tap and the sink, as well as at the joints of the inlet pipe. You can wipe these parts with a dry cloth and observe whether there are water stains on the cloth. If water droplets are found, immediately turn off the water valve, re – tighten the joints, or appropriately increase the number of turns of the PTFE tape wrapping until the water leakage problem is completely solved. For minor leaks that are difficult to detect, you can let it stand for a while after installation and check again.
3.Test the Switch Function: Open and close the tap switch multiple times to feel whether the operation is smooth and flexible, and whether there is any lag or excessive resistance. At the same time, if the tap has a rotation function, test whether the rotation is smooth and whether the rotation angle meets the design requirements. If there are abnormalities in the switch or rotation function, it may be due to improper installation or damage of internal components, and further inspection and adjustment are required.
VI. Common Installation Issues and Solutions
During the installation process, you may encounter some common problems. The following are the corresponding solutions for you:
The faucet is not installed firmly: It is manifested as the faucet shaking or loosening during use. The possible reasons might be that the fixing nut was not tightened properly or the sealing gasket was placed incorrectly. The solution is to use the wrench again to reinforce and tighten the fixing nut to ensure that the nut is securely fastened. If the nut has been tightened but is still loose, it is necessary to check whether the sealing gasket is flat and undamaged, reposition the gasket correctly, and replace it with a new gasket if necessary.
Leakage at the connection of the water inlet pipe: This is a relatively common problem during installation. It might be due to insufficient or uneven winding of the raw tape, or it could be that there is slight damage to the water pipe interface. First, close the water valve, remove the joint of the water inlet pipe, and rewind the raw material tape. Make sure the winding is uniform, tight, and the number of turns is appropriate. If there is still leakage after rewinding, check whether there are cracks or deformations at the water pipe joints. If so, new water pipes or joints need to be replaced.
Difficulty in operating the faucet switch: It might be due to improper installation of the internal valve core or impurities causing it to get stuck. Turn off the water source, remove the faucet handle, and check whether the valve core is installed correctly and if any foreign objects have entered. Clean the valve core and related components, and reinstall them after ensuring there are no impurities. If the valve core is damaged, it is necessary to contact the manufacturer or after-sales service to replace it with a new one.
Most faucet factories in China have professional after-sales technical teams. If users encounter any complex problems during the installation process, they can contact the after-sales personnel through the official customer service channels to obtain professional technical support and solutions. The after-sales team will provide detailed guidance based on the problems described by the user. If necessary, on-site service can be arranged to ensure that the user can complete the installation smoothly.
Vii. Safety Tips and Maintenance Suggestions
Installation safety tip: During the installation process, make sure to operate with the main kitchen water valve closed to prevent accidental water spraying due to negligence, which may cause property damage or personal injury. When using tools such as wrenches and pliers, pay attention to controlling the force and direction of operation to avoid scratching your hands due to excessive force or improper operation. Meanwhile, during the installation process, try to keep the working area clean and tidy to avoid damage or loss caused by the dropping of tools or accessories.
Daily maintenance suggestions: During daily use, regularly wipe the surface of the faucet with a soft dry cloth to promptly remove water stains and dirt, which helps maintain its metallic luster. Avoid using acidic or corrosive cleaners to prevent damage to the gun metal coating on the faucet surface. If there are slight scratches on the surface of the faucet, a special metal polish can be used for repair. In addition, if the faucet is not used for a long time, it is recommended to close the main water valve and drain the accumulated water in the pipes to prevent the pipes from freezing and cracking or breeding bacteria, thereby extending the service life of the faucet and keeping it in good performance all the time.
