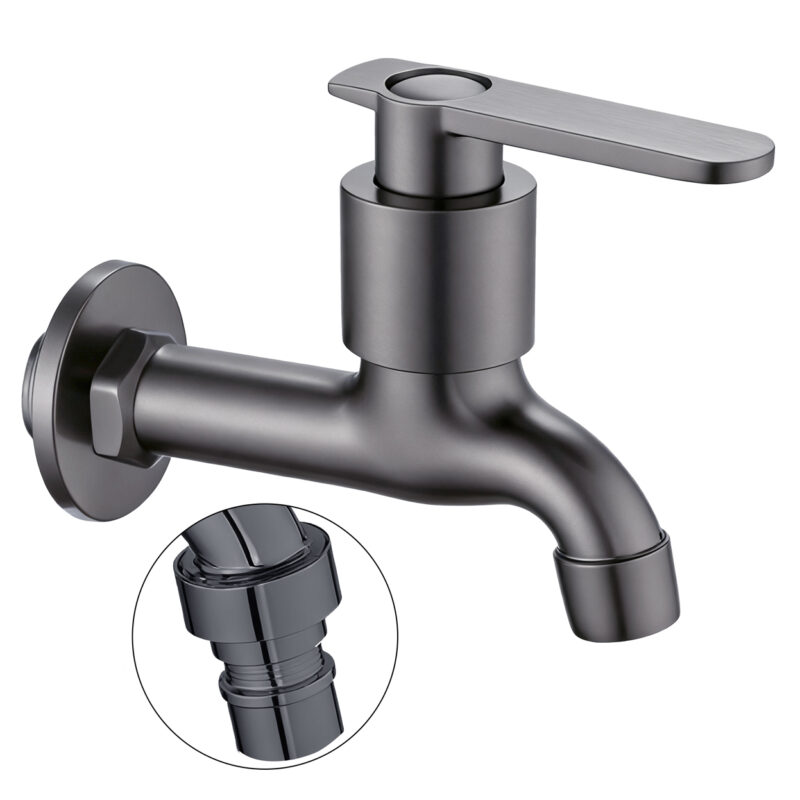
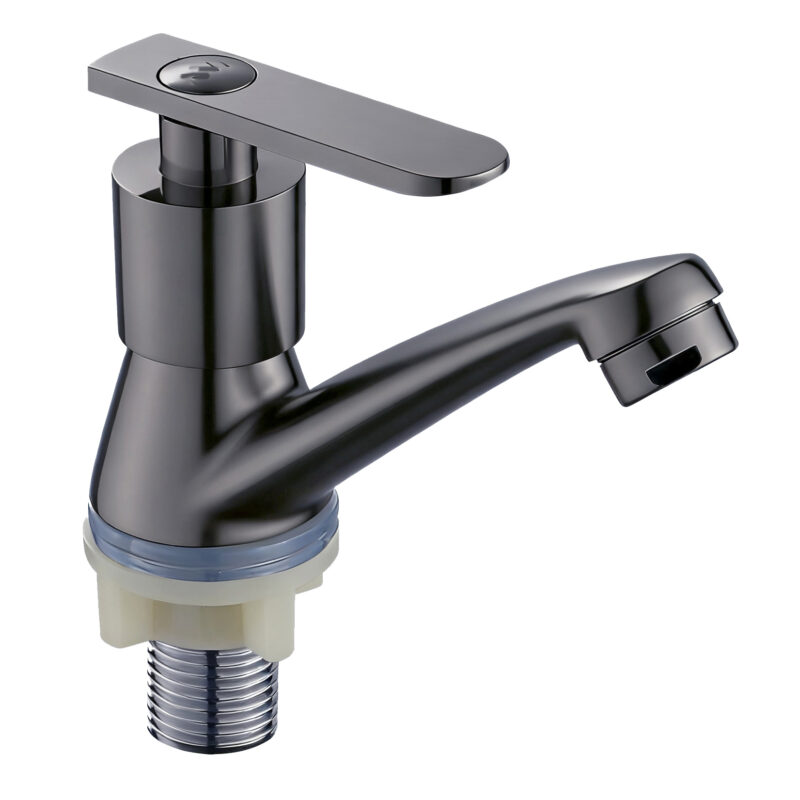
During kitchen renovation and hardware upgrades, copper kitchen taps, with the natural metallic luster and vintage charm bestowed by high-quality copper materials, have become the top choice for creating a classic ambiance. Their excellent corrosion resistance allows them to handle various water quality conditions with ease, while their outstanding durability ensures a long service life. Chinese kraanfabrieken, relying on advanced manufacturing processes and strict quality control systems, subject copper kitchen taps to multiple elaborate processing procedures, from forging and polishing to surface treatment. This ensures that each product combines powerful functionality with lasting aesthetics, making them suitable for various kitchen decoration styles, such as modern minimalist and new Chinese styles, and especially enhancing the charm of retro or classic-themed kitchens. The following will elaborate on the professional installation process and practical tips for copper kitchen taps (single-cold sink faucets).
I. Precautions Before Product Installation
Before installing a copper kitchen tap, thorough preparatory work is essential. First, carefully inventory the product accessories. Standard components typically include the tap body, inlet hoses (usually flexible and pressure-resistant stainless steel braided hoses), metal mounting nuts, rubber sealing gaskets, fixing screws, and accompanying lock washers. Use a high-precision tape measure to accurately gauge the diameter of the sink’s installation hole; the common aperture suitable for single-cold sink faucets ranges from 35 – 40mm, ensuring a precise match with the threaded interface at the bottom of the tap.
Moreover, it’s crucial to familiarize yourself with the layout of your home’s water supply system. Shut off the main water valve and open other water outlets (such as bathroom faucets) to completely release any residual water pressure in the pipes, preventing unexpected water spraying during installation. If the water hardness in your area is high (which can be confirmed through local water department reports or water quality testing pens), it is advisable to purchase a 前置 water filter in advance. This prevents the deposition of scale, such as calcium carbonate and magnesium carbonate, inside the tap, which could otherwise affect water flow efficiency and lifespan.
II. Vereist installatiegereedschap
As the saying goes, “Good tools are essential to the successful execution of a job.” The following professional tools are necessary for installing copper kitchen taps:
- Pipe Wrenches and Spanners: These are used for tightening inlet hose nuts and tap mounting nuts. An adjustable open-end wrench or a specialized pipe wrench is recommended, as it can adapt to different nut sizes.
- Phillips/Flathead Screwdrivers: For tap models with fixing screws, use the appropriate screwdriver for installation and securing.
- PTFE Band: A sealing tape made of polytetrafluoroethylene, it is wrapped around threaded connections to enhance joint tightness and prevent leakage.
- Spirit Level: This auxiliary tool helps ensure the tap is installed vertically, avoiding tilting that could affect both usability and aesthetics (optional).
- Cleaning Cloths and Buckets: These are used to promptly wipe away water stains during installation and collect residual water.
III. Voorbereidingsstappen vóór de installatie
- Water Shutdown and Pressure Release: After closing the main water valve, open the kitchen tap and other water outlets in the house. Once the water flow stops completely, confirm that there is no residual pressure in the pipes.
- Installation Surface Treatment: Use sandpaper or a wire brush to remove rust, oil stains, and cement residues around the sink’s installation hole. Then, wipe the area clean with a damp cloth to ensure a smooth and impurity-free surface.
- Pre-installation of Gaskets: Correctly embed the rubber sealing gasket into the groove at the bottom of the sink’s installation hole. Ensure that the gasket’s edge fully covers the hole to prevent water seepage.
- Inlet Hose Threading: Pass the inlet hose through the installation hole from above the sink, leaving a sufficient length (approximately 20 – 30cm) below the sink for subsequent connection operations.
IV. Standaard installatieproces
- Main Body Fixing: Insert the copper tap body vertically through the sink’s installation hole. Below the sink, successively place the metal washer, lock washer, and tighten the mounting nut. Use a pipe wrench to gradually tighten the nut in a diagonal sequence, and use a spirit level to check and maintain verticality during the process. Ensure the tightening torque is evenly applied (reference torque value: 15 – 20N·m) to avoid tap misalignment or damage caused by uneven stress.
- Inlet Hose Connection: Wrap 10 – 15 turns of PTFE tape clockwise around the threaded water inlet interface of the tap. Align the inlet hose with the interface, screw it in, and then use a spanner to tighten it until it is fully sealed. When connecting the cold water pipe, pay attention to the identification marks (usually blue indicates cold water) to avoid incorrect connections.
- Reinforcement: If the tap is equipped with fixing screws, pass them through the pre-drilled holes in the sink, screw them into the bottom holes of the tap, and tighten to further enhance stability.
V. Testen en inspecteren van het gebruik Belangrijkste punten
After installation, a comprehensive functionality test is required:
- Slowly open the main water valve and observe for any leakage at the inlet hose connections and where the tap meets the sink, focusing on threaded joints and gasket edges.
- Open and close the tap handle multiple times to test the stability and uniformity of the water flow, checking for any fluctuations or interruptions.
- Rotate the tap body to assess its flexibility. Under normal conditions, there should be no jams or abnormal noises, and it should be able to rotate 360°.
- Leave the tap undisturbed for 10 – 15 minutes and then recheck all connections to confirm there are no delayed leakage issues.
VI. Vaak voorkomende installatieproblemen en oplossingen
| Problem Type | Mogelijke oorzaken | Oplossingen |
| Interface lekkage | Insufficient or incorrectly wound PTFE tape | Shut off the water valve, remove the inlet hose, rewrap the PTFE tape clockwise (ensuring it covers 2 – 3 thread pitches), and reconnect |
| Tap Wobbling | Mounting nut not tightened properly or gasket displacement | Retighten the nut to the specified torque, adjust the gasket position, and add additional gaskets if necessary to enhance sealing |
| Low Water Flow | Inlet hose kinking, blockage, or valves not fully open | Check for excessive bends in the inlet hose, clean impurities from the pipe, and ensure the main water valve and angle valves are fully open |
| Splashing Water | Aerator blockage or damage | Remove the aerator, soak it in white vinegar for 1 – 2 hours, then rinse it, or replace it with a new one directly |
VII. Veiligheidstips en onderhoudssuggesties
- Installation Safety: Wear gloves during operation to prevent cuts from metal edges. Avoid using excessive force to prevent nuts from stripping or the tap from cracking.
- Daily Maintenance: Wipe the tap surface weekly with a mild cleaner (such as diluted dish soap) and a soft cloth to remove water stains and dirt. Check the tightness of all connections monthly and reinforce any loose nuts promptly.
- Long-term Care: Disassemble and deeply clean the aerator every six months. If patina appears on the surface, wipe it with lemon slices and then rinse with clean water to maintain its metallic luster.

Chinese faucet factories, with their mature manufacturing processes and comprehensive quality control systems, offer high-quality copper kitchen taps to consumers. With this systematic installation guide and maintenance advice, even first-time installers can complete the task smoothly and enjoy the classic aesthetics and practical benefits of copper kitchen taps for years to come.